PhotoStepper
A stepper motor controller for use in photography.
This is a device that can be used to control a stepper motor and a camera, to make a defined number of photos with a defined movement in between. A stepper motor can be attached to a rotating platform or to a linear drive, so either the object or the camera can be moved between the pictures.
Hardware
The device consists of the following components:
- Arduino Uno, the brains of the operation
- LCD & keypad shield, as the user interface
- an A4988 stepper motor driver
- a 100uF capacitor
- two PC817 opto-isolators
- two 1k resistors
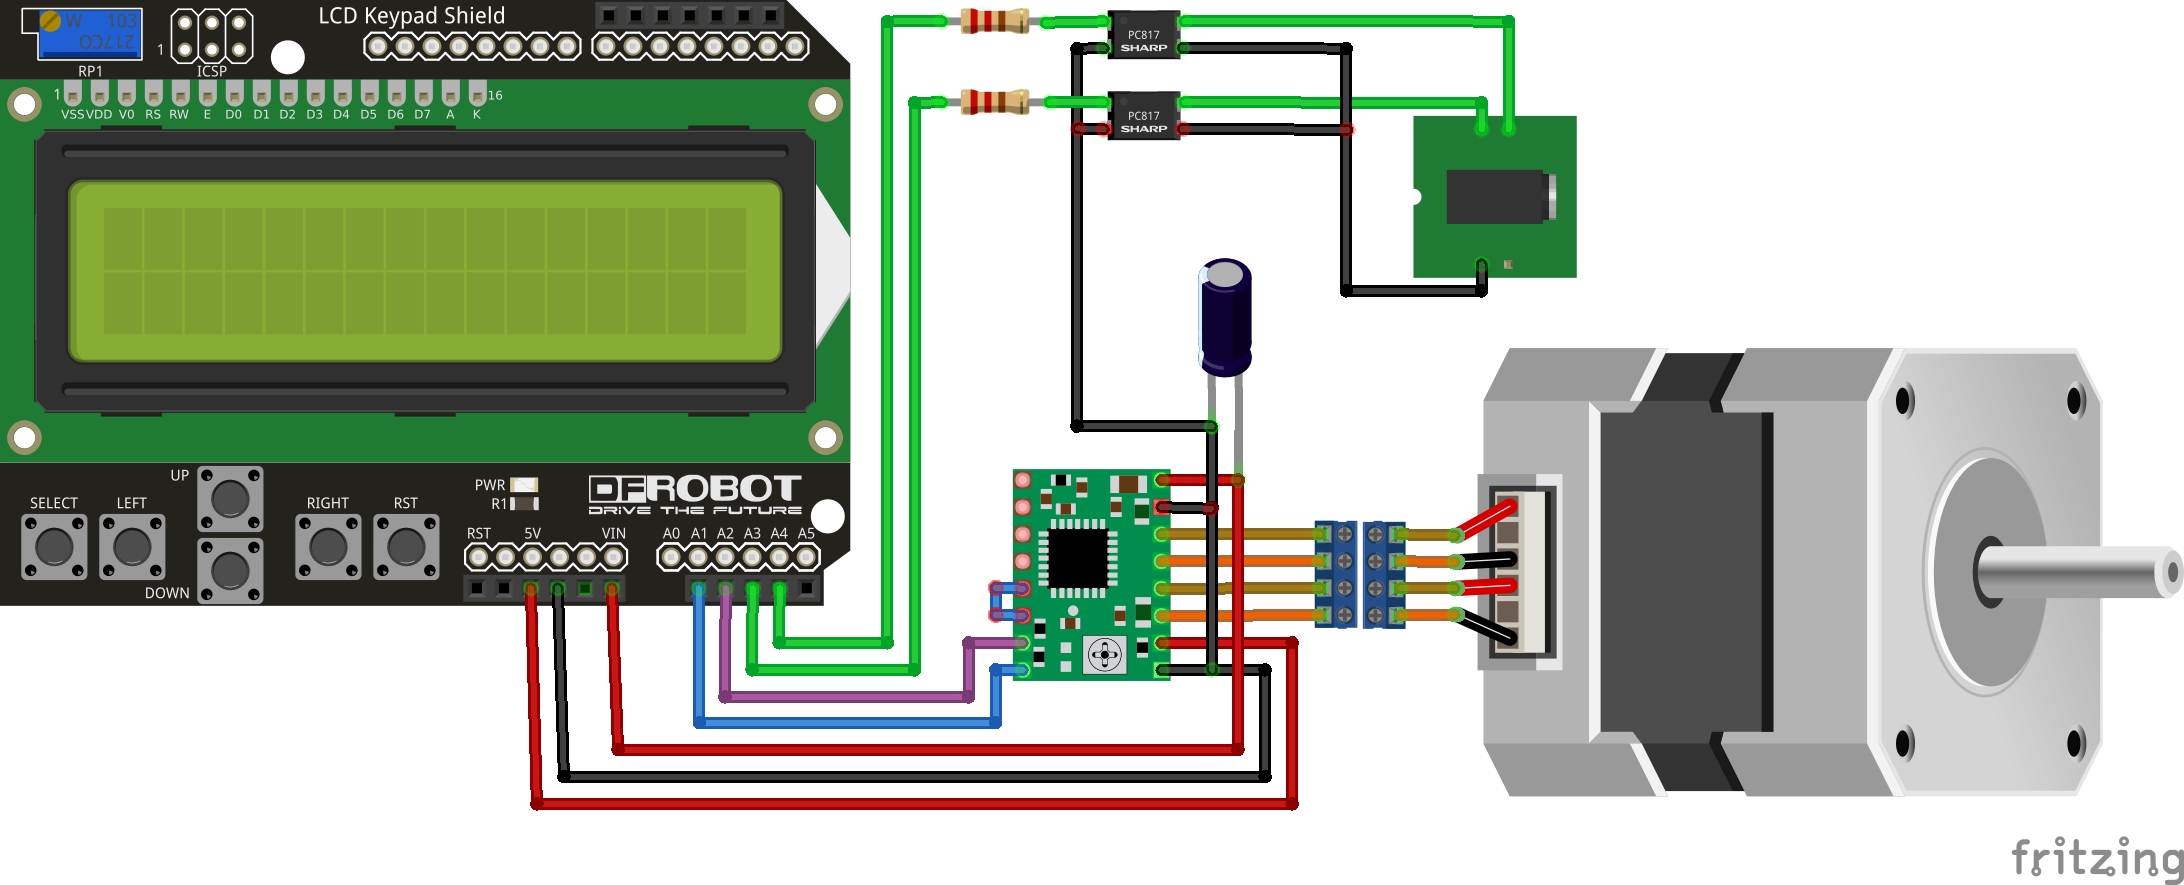
The circuit is pretty simple:
Atop of that, I used an M13 connector for the stepper motor and a 2.5mm stereo phone connector for the camera. To interface my camera, I had a ready made cable from a remot camera controller (Ayex AX-5). The whole thing is powered by a 12V power supply, connected directly to the Arduino.
This is the ideal case for the build: https://www.thingiverse.com/thing:142282/files
Software
This project makes heavy use of the following libraries:
- ArduinoMenu 4 (v4.21.4) for the menu structure
- StepperDriver (v1.3.1) for motor control
- AnalogKeypad by Makuna (v1.1.1) for reading input keys
Menu structure
The main menu offers the following features:
-
Jog
Up and down buttons move the motor manually, pressing the buttons for more than a second doubles the speed.
-
Configuration
General settings for the device:
-
Settle time (tSettle, default 1000ms)
Pause between motor movement and camera triggers, to avoid shaking.
-
Focus time (tFocus, default 1000ms)
Half-press of the shutter button, time to let the camera focus.
-
Shutter time (tShutter, default 1000ms)
How long to press the trigger.
-
Return (default: On)
Reverse any movement to starting point after shooting the whole scene.
-
DarkenLCD (default: Off)
Turn off LCD backlight while shutter is open.
-
-
Scene
Settings for a particular scene:
-
Steps (nSteps, default 10)
Number of steps for this scene.
-
Distance per step (distance, default 0.5mm)
How far to move between the steps.
-
-
Run
Run the whole setup.
Example results
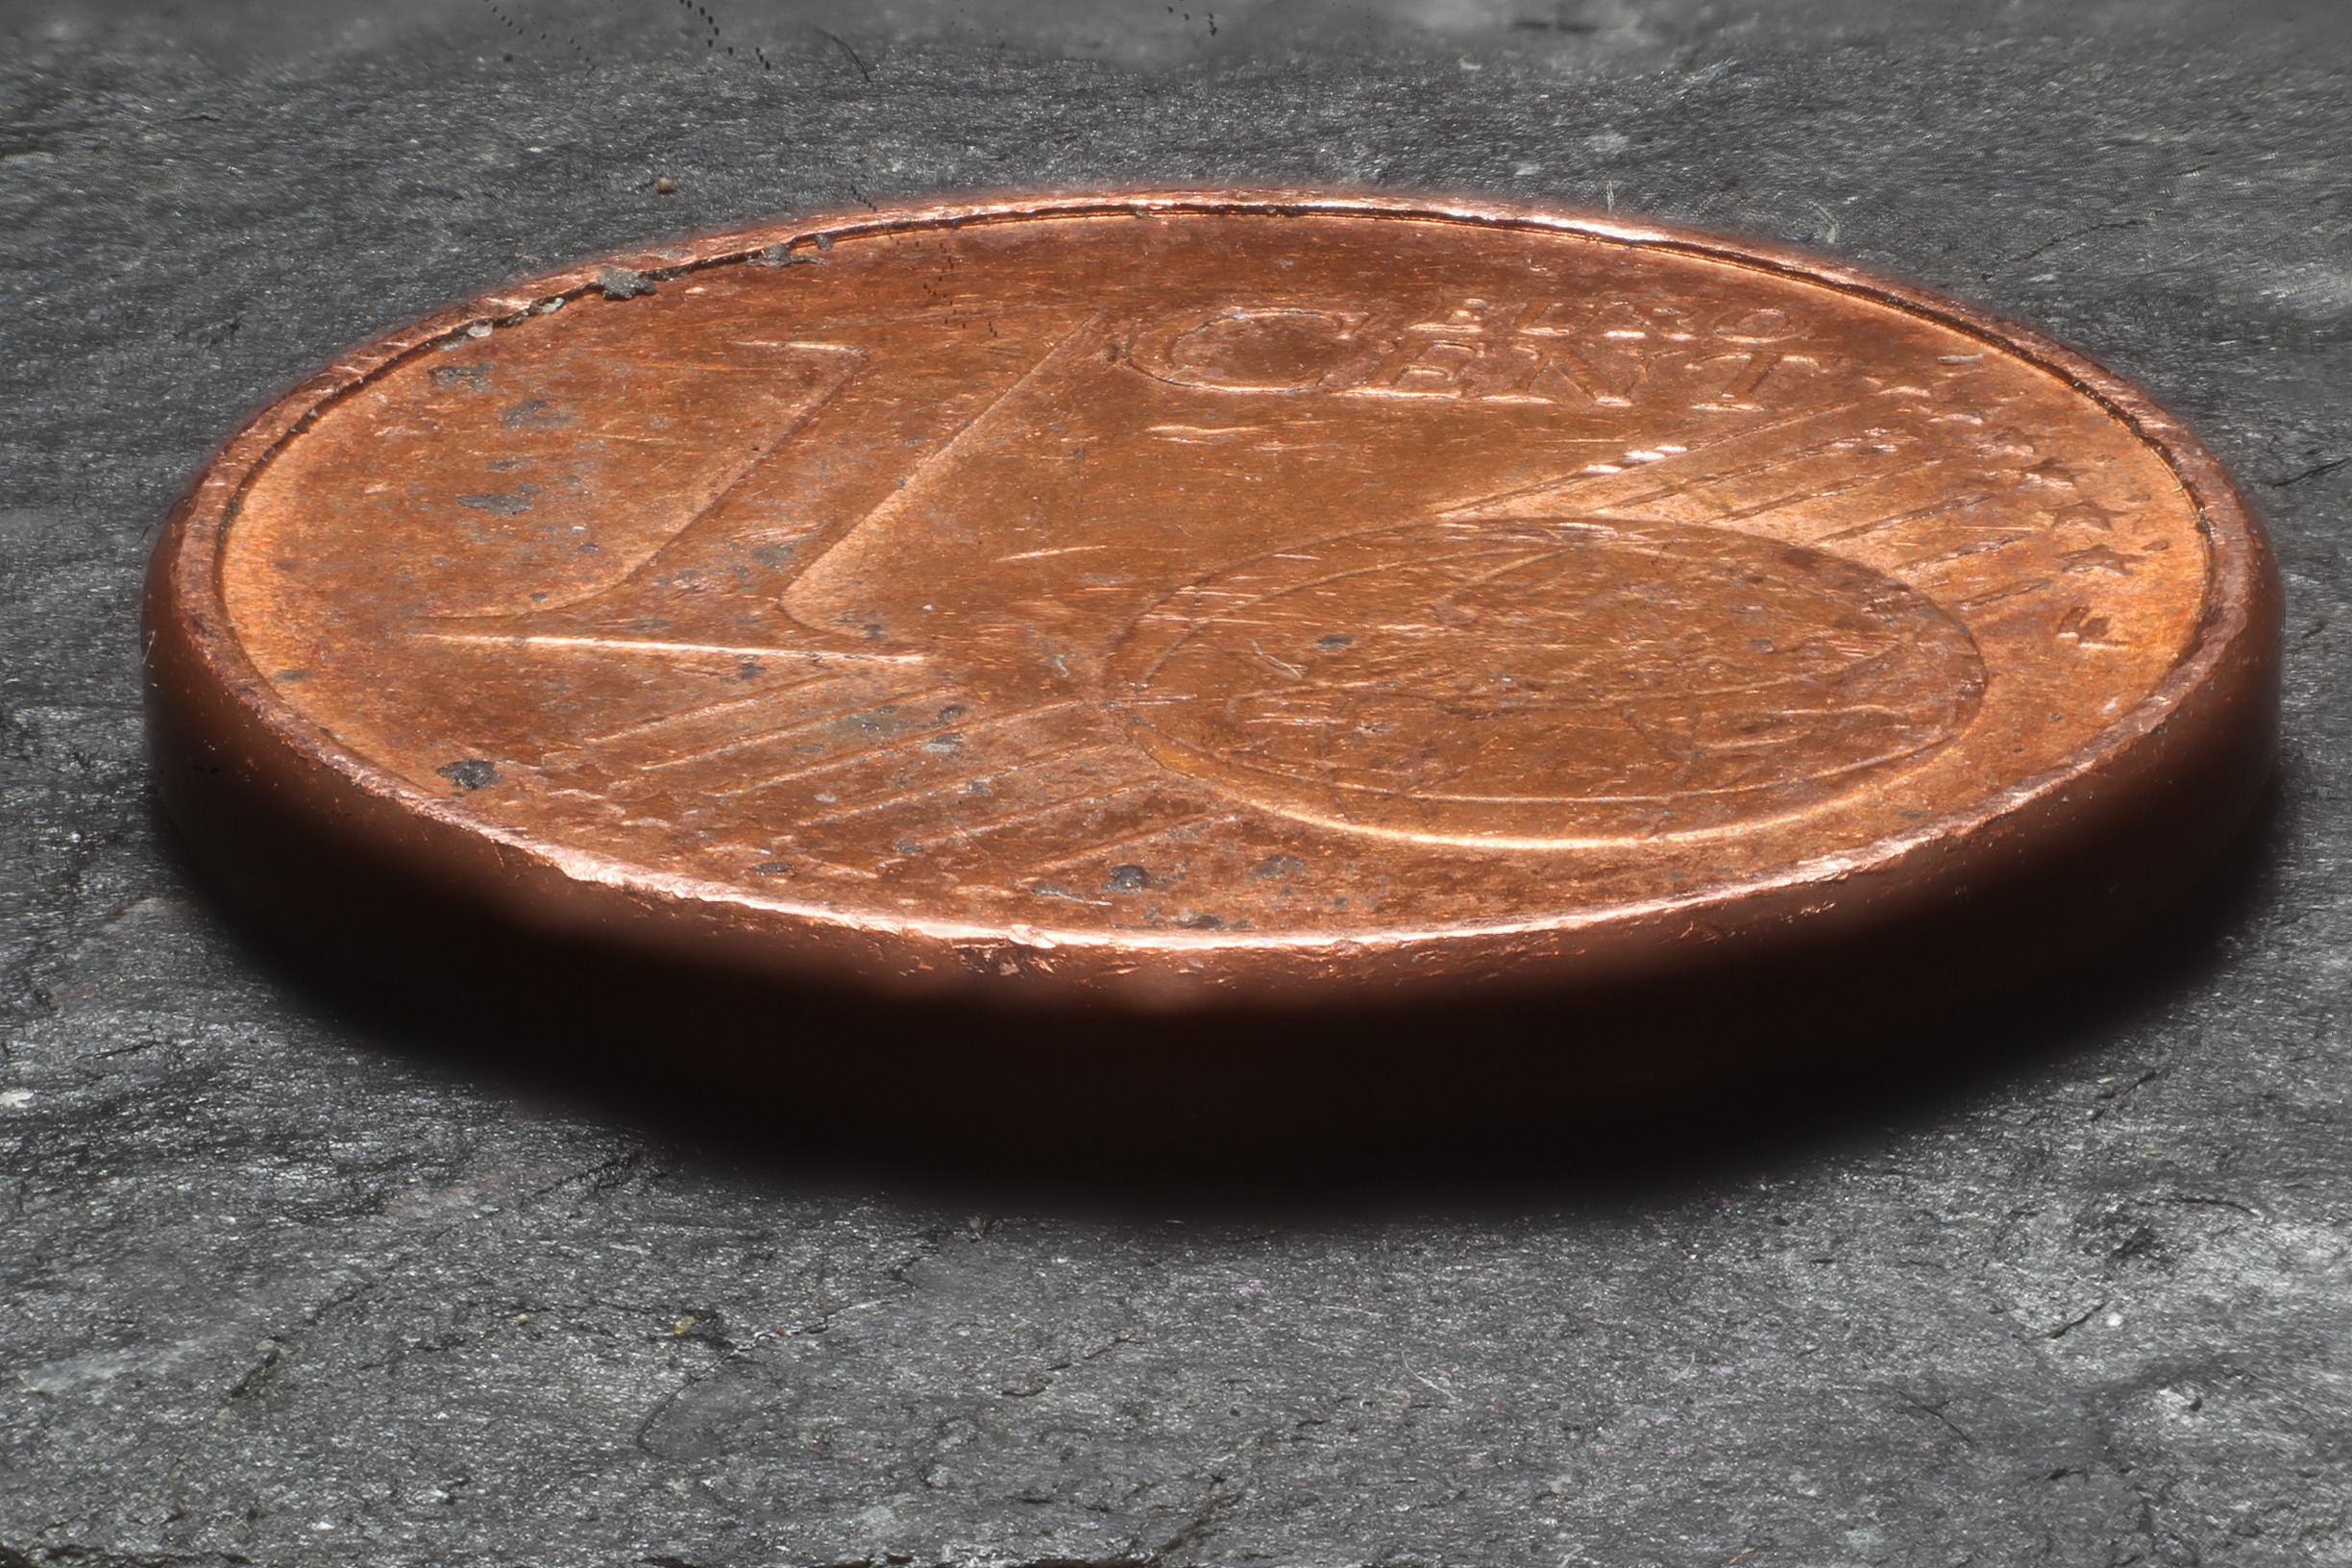
This is the first image that was made using this project:
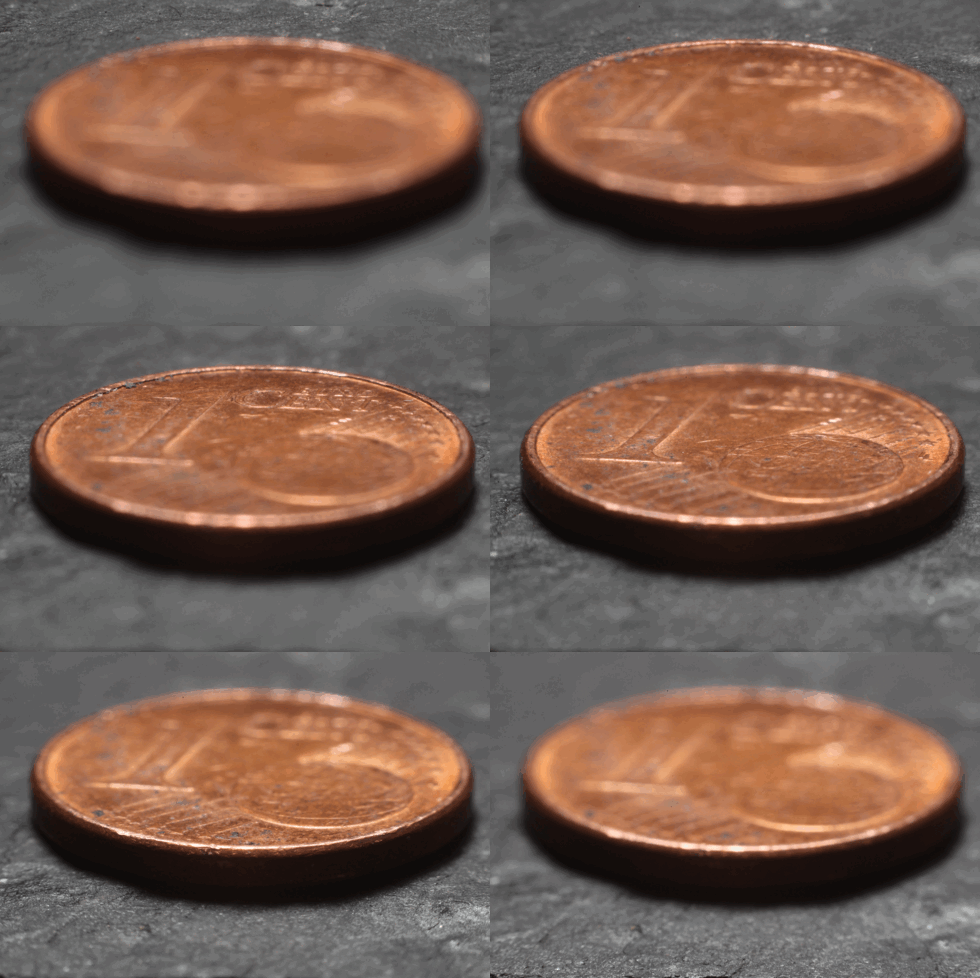
Depth of field for my setup is a little more than 1mm, so this image is composed from 30 different shots, each 1mm apart. Here's an animation of the non-fused images:
The images were taken as JPG. For some reason the align-program did strange things with my full size images, so I reduced them in size first -- it's only a first test:
for i in *.JPG; do convert $i -resize 50% $i.tif; done
Then I was able to align all images:
align_image_stack -ma aligned_ AJ9E94*.tif
Once all images had been alignes, I created the final image from my stack of photos:
enfuse -o result.tif --exposure-weight=0 --saturation-weight=0 --contrast-weight=1 --hard-mask --contrast-edge-scale=0.5 aligned_00*


